

A tub to shower conversion is defined as the process of removing an existing bathtub and replacing it with a fully functional shower in the same bathroom footprint. For New Mexico homeowners, this upgrade delivers real daily value: more usable space, easier access, and a cleaner, more modern look. Costs typically range from $2,000 to $15,000+ depending on materials and complexity. The process covers everything from demolition and plumbing updates to waterproofing and final finishes. This guide walks you through what to expect at every stage, so you can plan with confidence and avoid costly surprises.
What does a tub to shower conversion cost?
Tub to shower conversion costs range from $2,000 to $12,000 on average, with custom tiled walk-in showers reaching $15,000 or more. The gap between those numbers is wide, and the difference comes down to three things: materials, plumbing complexity, and the size of the shower footprint.
Here is a straightforward breakdown of what you can expect to pay:
Prefab acrylic or composite panel kits: $2,000–$5,000, including demolition and basic installation
Branded one-day systems: $4,000–$9,500, which include a prefabricated base and wall surround installed in a single visit
Standard tiled alcove showers: $5,000–$12,000, factoring in waterproofing, cement board, tile, and fixtures
Custom walk-in or natural stone showers: $9,000–$15,000+, with package costs ranging from $3,500 for composite panels up to $12,000 for natural stone with custom features
Since 2024, overall conversion costs have increased 6–8%, with glass enclosure prices rising 12%. If you are budgeting for a frameless glass door or panel, factor in that premium now rather than later.
How long does the project take?
Project timelines range from one day for a prefab kit to 14 days for a fully custom tiled shower. Tile work requires curing time between layers, which is the main reason custom projects stretch across two weeks.
| Conversion type | Estimated timeline |
|---|---|
| Prefab acrylic kit | 1–2 days |
| Tiled alcove shower | 5–7 days |
| Custom walk-in shower | 8–14 days |
Plumbing changes, subfloor repairs, and specialty materials all add time. If your project stays within the existing footprint and drain location, you will stay closer to the shorter end of these ranges.
Design ideas for your shower conversion
The best shower designs start with one practical decision: keep the existing alcove footprint whenever possible. Maintaining the original layout reduces plumbing costs and keeps the project timeline tight. Moving a drain or repositioning supply lines adds both labor and materials costs that most homeowners do not anticipate.
Within that footprint, you have real design flexibility. Here are the options that deliver the strongest combination of function and visual appeal:
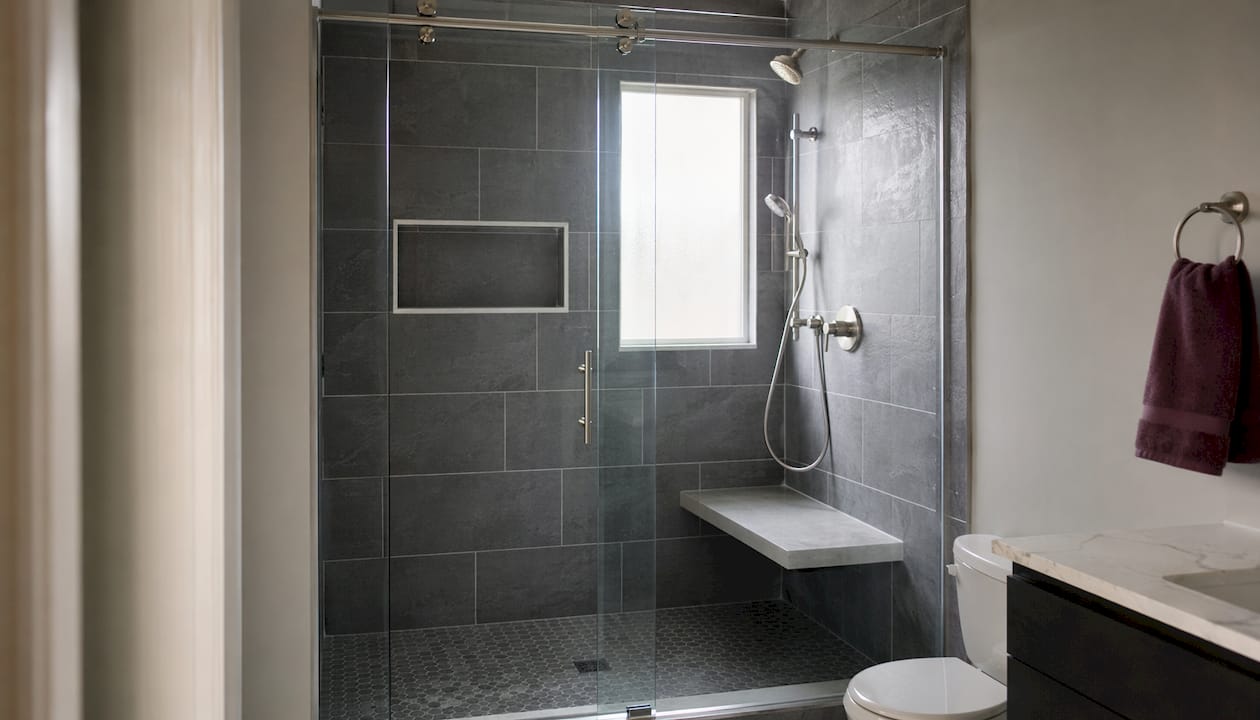
Curbless or zero-threshold showers: These eliminate the step-over lip, making the shower accessible for all ages. They also read as more modern and are easier to clean. This is the right choice if you are planning for long-term use or resale appeal.
Floor-to-ceiling tile: Large-format tiles running from floor to ceiling create a clean, uninterrupted look. They also reduce grout lines, which means less maintenance over time.
Frameless glass enclosures: A frameless glass panel or door opens the bathroom visually. Combined with large tiles, this approach makes even a compact New Mexico bathroom feel significantly more spacious.
Built-in niches and bench seats: Recessed niches provide storage without adding bulk. A built-in bench adds comfort and accessibility. Both require early planning, which is covered in the pitfalls section below.
Pro Tip: Choose your tile size before finalizing the niche dimensions. Large-format tiles (12×24 inches or bigger) require niche openings sized to avoid awkward cuts, which saves labor and looks far more intentional.
For more ideas on maximizing your bathroom space, the luxurious bathroom remodel guide from Trusselltransforms covers design details that translate directly to shower conversions.
Step-by-step guide to the conversion process
A professional tub to shower remodel follows a clear sequence. Understanding each phase helps you track progress and ask the right questions.
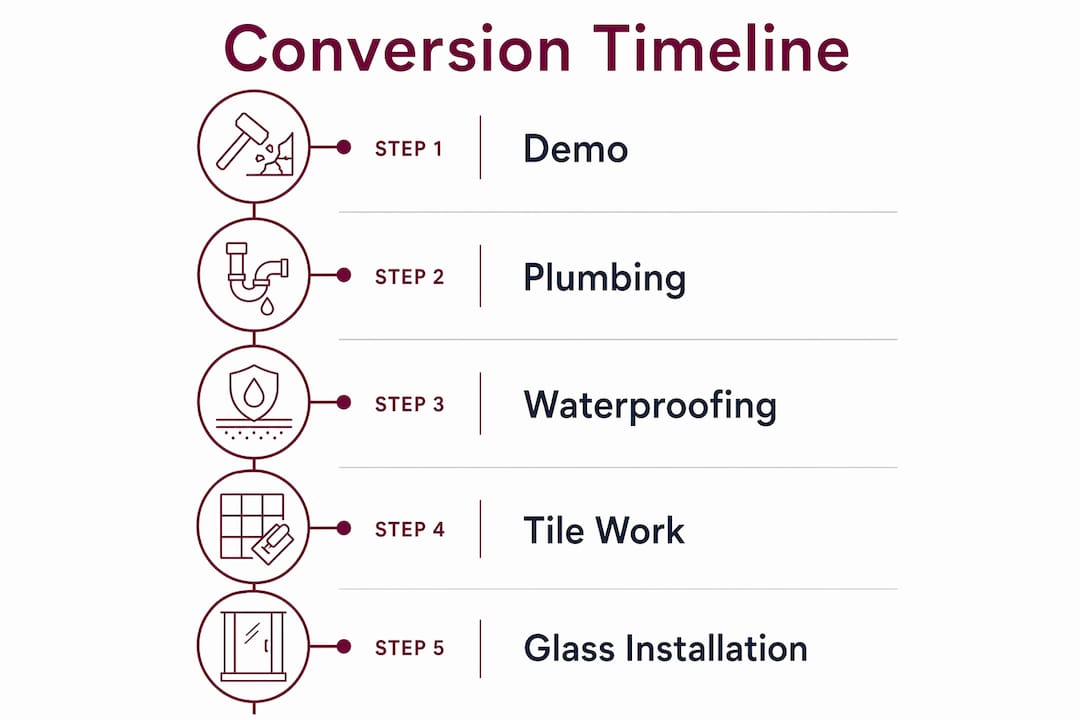
Demolition and tub removal. The tub, surround walls, and any damaged drywall come out first. This is when hidden moisture damage gets discovered. Inspecting and repairing the subfloor under the removed tub is standard practice because 20–30 years of hidden moisture is common behind older tubs.
Subfloor inspection and repair. Any soft, warped, or water-damaged subfloor gets replaced before anything else goes in. Skipping this step leads to tile failure and mold problems down the road.
Plumbing updates. The drain gets repositioned if the new shower layout requires it. The shower valve and supply lines get roughed in at this stage. Drain relocation adds $800–$1,500 to the project cost due to subfloor cutting and repositioning work. Keeping the drain in its original location is the single easiest way to control your budget.
Waterproofing. This is the most critical step in the entire project. Professional-grade systems like the KERDI membrane get applied to all wall surfaces and the shower floor before any tile goes down. Improper waterproofing is the leading cause of long-term shower failure, so this step should never be rushed or skipped.
Shower base and wall installation. For prefab systems, the base and wall panels go in at this stage. For tiled showers, cement board or a similar substrate gets installed first, followed by the tile itself in multiple sessions with curing time between coats.
Fixture and glass installation. The shower valve, showerhead, and any handheld fixtures get installed. The glass enclosure or frameless door goes in last, after tile work is fully cured.
Pro Tip: Schedule your glass enclosure measurement after tile installation is complete, not before. Tile can shift the opening dimensions slightly, and a custom-cut glass panel ordered too early may not fit.
For a broader look at how this fits into a full bathroom renovation, the bathroom remodel key steps guide from Trusselltransforms walks through the full process in detail.
Common pitfalls and how to avoid them
Most budget overruns in a shower conversion trace back to a handful of predictable problems. Knowing them in advance puts you in a much stronger position.
Hidden moisture damage is the most common surprise. Repairs to damaged subfloor and framing typically cost $500–$2,000 on top of the base project price. Build a contingency of at least 10–15% into your budget to cover this possibility.
Moving the drain is the highest-cost plumbing decision you can make. If your shower design requires relocating the drain, expect to add $800–$1,500 to your total. Design your layout around the existing drain position whenever the room dimensions allow it.
Planning niches and benches too late is a costly mistake. Built-in niches and bench seats require precise framing and advanced waterproofing techniques. Deciding to add them after tile work has started means tearing out completed work. Lock in these decisions before demolition begins.
Skipping professional waterproofing creates problems that show up years later, not immediately. By the time you see water damage on the other side of the wall, the repair cost far exceeds what proper waterproofing would have cost upfront.
“A tub to shower conversion is not just a fixture swap. It is a structural upgrade that requires moisture protection systems built to last decades. Cutting corners on waterproofing to save a few hundred dollars today will cost thousands in repairs within five years.”
Conversions also boost resale value when the home retains at least one bathtub elsewhere. If you are converting the only tub in the house, confirm that the upgrade aligns with your long-term plans for the property.
Key Takeaways
A successful tub to shower conversion requires early planning, professional-grade waterproofing, and design decisions made before demolition begins.
| Point | Details |
|---|---|
| Cost range is wide | Budget $2,000–$15,000+ depending on materials, plumbing complexity, and shower type. |
| Timeline varies by method | Prefab kits finish in 1–2 days; custom tiled showers take 8–14 days due to curing. |
| Keep the drain in place | Relocating the drain adds $800–$1,500; designing around its current position saves money. |
| Waterproofing is non-negotiable | Systems like KERDI membrane prevent the moisture damage that causes long-term shower failure. |
| Plan niches and benches early | Built-in storage and seating must be framed before tile work begins to avoid costly rework. |
What I have learned after years of bathroom renovations
By Christy
Homeowners consistently underestimate how much a shower conversion changes the way a bathroom feels to use every single day. A well-designed shower with a curbless entry and a built-in bench is not just more attractive. It is genuinely more functional for everyone in the household, including guests and aging family members.
The misconception I see most often is that a conversion is essentially a cosmetic project. Homeowners focus on tile colors and glass styles, which are real decisions, but they overlook the structural work underneath. The waterproofing, the subfloor condition, and the drain placement determine whether the shower lasts 5 years or 30 years. Aesthetics matter, but they sit on top of a foundation that has to be done right.
My honest advice: do not let the design choices distract you from the technical ones. Choose your layout and drain position first. Confirm your niche and bench plans before anything is ordered. Then pick your tile. That sequence protects your budget and your timeline. Working with a qualified contractor who coordinates plumbing, waterproofing, and tile in the right order is the single best investment you can make in this project.
— Christy
Ready to convert your tub with Trusselltransforms?
Trusselltransforms has served Albuquerque and New Mexico homeowners for over 25 years, handling bathroom renovations from design through final installation. The team manages every phase of a tub to shower project: demolition, plumbing coordination, waterproofing, tile work, and fixture installation.
Whether you want a clean prefab system installed in a day or a fully custom tiled walk-in shower, Trusselltransforms builds to your budget and your timeline. The bathroom remodel guide on the Trusselltransforms website covers the full process in detail and is a strong starting point for planning your project. You can also explore Albuquerque bathroom remodel options directly to see what is possible for your space. Contact Trusselltransforms to schedule a consultation and get a clear, honest estimate for your conversion.
FAQ
How much does a tub to shower conversion cost?
Costs range from $2,000 to $15,000+ depending on whether you choose a prefab kit or a custom tiled shower. Glass enclosures and drain relocation add to the total.
How long does it take to convert a tub to a shower?
Prefab installations take 1–2 days, while custom tiled showers typically take 8–14 days due to waterproofing and tile curing requirements.
Will removing my tub hurt my home’s resale value?
Conversions support resale value when the home retains at least one bathtub. Converting the only tub in the house can reduce buyer appeal, so confirm your home’s overall bath count before proceeding.
What is the most important step in the conversion process?
Waterproofing is the most critical step. Professional systems like the KERDI membrane protect the subfloor and framing from moisture damage that would otherwise go undetected for years.
Can I keep my existing drain location to save money?
Yes, and you should whenever possible. Drain relocation adds $800–$1,500 to the project cost. Designing your shower layout around the existing drain position is the most reliable way to control your budget.
Recent Comments